|
 |
 |
 |
 |
 |
 |
 |
 |
 |
 |
 |
 |
 |
 |
 |
 |
 |
 |
 |
 |
 |
 |
 |
 |
 |
 |
 |
 |
 |
 |
 |
 |
 |
 |
 |
 |
 |
 |
 |
 |
 |
 |
 |
 |
 |
 |
 |
 |
 |
 |
 |
 |
 |
 |
 |
|
|
 |
|
|
|
 |
|
 |
|
 |
|
 |
|
 |
|
 |
|
|
|
Strong Wind |
|
|
|
 |
|
|
|
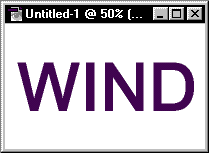
Make a new image File>New,
Width: 400 pixels Height: 250 pixels Mode: RGB Color Contents: White |
|
|
|
|
|
 |
|
|
|
In your image, type in some letters, try to use darker colors for the words: |
|
|
|
|
|
 |
|
|
|
|
|
 |
|
|
|
Press Ctrl + E to merge the two layers together. You should see only one layer now.
Go to Filter>Stylize>Wind, then select the "Wind" for Method and "From the right" for Direction.
The words have some wind effects now... |
|
|
|
|
|
 |
|
|
|
 |
|
Go to Filter>Blur>Motion Blur, set the settings to: Angle: 0 Distance: 10 pixels
Again........ Go to Filter>Stylize>Wind, then select the "Wind" for Method and "From the right" for Direction. Then Filter>Blur>Motion Blur, set the settings to: Angle: 0 Distance: 10 pixels
Then your image should look like this: |
|
|
|
|
|
 |
|
|
|
 |
|
|
|
Go to Filter>Sharpen>Unsharp Mask, set the settings to: Amount: 50% Radius: 4 pixels Threshold: 2 Levels
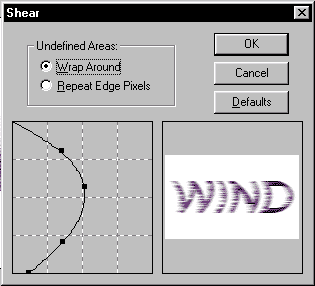
Go to Filter>Distort>Shear: |
|
|
|
|
|
 |
|
|
|
Click and drag the line and make it like the picture on the left. |
|
|
|
|
|
 |
|
|
|
Go to Filter>Distort>Spherize, set the settings to: Amount - 60 Mode - Normal |
|
|
|
|
|
 |
|
|
|
 |
|
|
|
 |
|
|
|
|
|
|
|
|
|